Editor de rich-text do Odoo
O editor de rich-text do Odoo permite criar e editar conteúdo de rich-text em campos HTML, como os campos Notas Internas e Descrição, bem como em artigos do Knowledge <knowledge/articles_editing/edit-article> e no editor de relatórios do Studio <studio/pdf-reports/report-editor>, entre outros. Comece a digitar ou use a barra de ferramentas <essentials/html_editor/toolbar> ou powerbox <essentials/html_editor/commands> para formatar e estruturar o texto.
Barra de ferramentas do editor de texto
Para editar uma palavra, frase ou parágrafo, selecione-o ou clique duas vezes nele para exibir a barra de ferramentas do editor de texto e aplicar qualquer uma das seguintes opções de formatação padrão:
Font style: Define the font style using various options, such as Header 1 to 6, Normal, Paragraph, Code, and Quote.
Font size: Select the preferred font size.
fa-bold (Toggle bold): Put the text in bold.
fa-italic (Toggle italic): Put the text in italics.
fa-underline (Toggle underline): Underline the text.
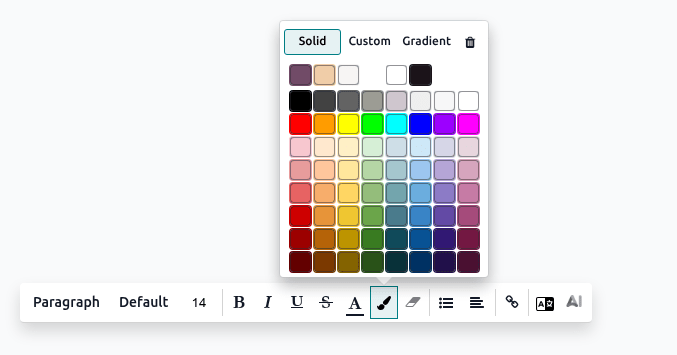
fa-font (Apply Font Color): Customize the font colors:
Solid: Select the preferred color from the predefined palette.
Custom: Customize the color palette using the wheel or by configuring the hex code and RGBA values.
Gradient: Select a predefined gradient or customize it by choosing between Linear or Radial and adjusting the wheel.
fa-trash (Reset): Restore the original font/background color.
fa-link (Add a link): Insert or edit a URL link to a selected text, and optionally upload an image using its file URL.
Odoo AI: Write a prompt and get AI-generated content. Optionally, click the AI suggestions instead of writing a prompt.
Clique no ícone fa-ellipsis-v (Expandir barra de ferramentas) para exibir opções de formatação adicionais:
Font family: Use the Default system font or select a preferred font family for the text.
fa-strikethrough (Toggle strikethrough): Strike through the text.
fa-paint-brush (Apply Background Color): Customize the background colors.
fa-eraser (Remove Format): Remove all formatting applied to a selected text.
fa-list-ul (Toggle List): Select the following list options:
fa-list-ul (Bulleted list): Turn the text into a bulleted list.
fa-list-ol (Numbered list): Turn the text into a numbered list.
fa-check-square-o (Checklist): Turn the text into a checklist.
fa-align-left (Align text): Select the following text alignments:
fa-align-left (align left): Align the text on the left.
fa-align-center (align center): Align the text in the center.
fa-align-right (align right): Align the text on the right.
fa-align-justify (justify): Apply straight edges to both text margins.
Translate with AI: Translate the content in the installed languages with AI.
Comandos da Powerbox
Comandos permitem editar e gerenciar vários tipos de recursos dentro do editor de texto, como tabelas, banners, cabeçalhos e muito mais.
Para usar um comando, digite / para abrir a powerbox e, em seguida, digite o nome do comando ou selecione entre vários recursos para inserir tabelas, imagens, banners etc.
Command |
Use |
|---|---|
fa-minus Separator |
Insert a horizontal rule separator. |
fa-columns 2 columns |
Convert into 2 columns. |
fa-columns 3 columns |
Convert into 3 columns. |
fa-columns 4 columns |
Convert into 4 columns. |
fa-table Table |
Insert a table. |
fa-list-ul Bulleted list |
Create a bulleted list. |
fa-list-ol Numbered list |
Create a numbered list. |
fa-check-square-o Checklist |
Create a checklist. |
fa-caret-square-o-right Toggle list |
Hide a group of text under a foldable toggle. |
Para organizar uma tabela, passe o mouse sobre uma coluna ou linha para exibir o menu da tabela. Clique no ícone fa-ellipsis-h (elipse) para mover, inserir ou excluir uma coluna ou linha.
Command |
Use |
|---|---|
fa-info-circle Banner Info |
Insert an info banner. |
fa-check-circle Banner Success |
Insert a success banner. |
fa-exclamation-triangle Banner Warning |
Insert a warning banner. |
fa-exclamation-circle Banner Danger |
Insert a danger banner. |
Command |
Use |
|---|---|
fa-header Heading 1 |
Big section heading. |
fa-header Heading 2 |
Medium section heading. |
fa-header Heading 3 |
Small section heading. |
fa-paragraph Text |
Paragraph block: Insert a paragraph. |
fa-exchange Switch direction |
Switch the text's direction. |
fa-quote-right Quote |
Add a blockquote section. |
fa-code Code |
Add a code section. |
Command |
Use |
|---|---|
fa-file-image-o Media |
Insert an image <insert-media> or icon: Search the Unsplash database or upload images, documents, or icons. |
fa-upload Upload a file |
Add a download box: share images, recordings, or documents that internal users can download. |
Command |
Use |
|---|---|
fa-link Link |
Add a link: Type the label and enter a URL or upload a file, then click Apply. |
fa-link Button |
Add a button: Type the label, enter a URL or upload a file, select the button style, type, and size, then click Apply. |
fa-bookmark Table Of Contents |
Highlight the structure (headings): Create a table of content based on the headings. |
Command |
Use |
|---|---|
fa-smile-o Emoji |
Add an emoji: search for the desired emoji. |
fa-star-o 3 Stars |
Insert a rating of up to 3 stars. |
fa-star 5 Stars |
Insert a rating of up to 5 stars. |
Inserir mídia
Para inserir mídia, digite /Media ou clique no ícone fa-file-image-o (mídia) na dica de ferramenta, em seguida escolha entre as seguintes abas:
Images
Search the Unsplash database to find a suitable image.
Add URL: Copy-paste the image address.
Upload an image: Upload an image into the library.
Documents
Search for a document in the database.
Add URL: Copy-paste a valid URL.
Upload a document: Upload a document from a local drive.
Icons: Search for and select one of the available icons.
Videos: Paste a video URL of the following sources: YouTube, Vimeo, Dailymotion, and Youku. Alternatively, type code to embed a video.
Barra de ferramentas do editor de mídia
Após inserir uma imagem <insert-media>, clique nela para exibir a barra de ferramentas do editor de mídia e aplique qualquer uma das seguintes opções de formatação:
fa-search-plus (Preview image): Preview the image, zoom in or out, rotate it, print it, or download it. Exit the preview by clicking the fa-times (close) icon in the top right corner.
Description: Edit the image description and tooltip, then click Apply.
Caption: Write a caption under 100 characters below the image.
fa-square (Rounded): Apply a rounded shape to the corners of the image.
fa-circle-o (Circle): Apply a circular shape to the image.
fa-sun-o (Shadow): Apply a shadow effect to the image.
fa-picture-o (Thumbnail): Apply a border to the image.
fa-plus-square-o (Padding): Add an image padding and choose from Small, Medium, Large, or XL sizes.
Resize: Restore the image to its default size or set its size to 25%, 50%, or 100%.
fa-object-ungroup (object): Resize and rotate the image. Click the fa-object-ungroup (object) icon a second time to reset the transformation.
fa-crop (Crop image): Crop the image manually or apply the following options:
Choose from the Flexible, 16:9, 4:3, 1:1, or 2:3 aspect ratios.
Zoom in or out.
Rotate left or right.
Flip horizontally or vertically.
Reset the image.
fa-link (Add a link): Add a link to the image, type the URL, then click Apply. To remove the link, click fa-unlink (Remove Link).
fa-exchange (Replace): Replace the image by searching in the Unsplash database, adding a URL, or uploading a different one.
fa-trash (Delete): Delete the image.
Barra de ferramentas do editor de ícones
Após inserir um ícone <insert-media>, clique nele para exibir a barra de ferramentas do editor de ícones e aplique qualquer uma das seguintes opções de formatação:
fa-font (Select Font Color): Customize the font color.
fa-paint-brush (Select Background Color): Customize the background color.
Resize icon: From 1x to 5x.
fa-play (Toggle icon spin): Activate the spin animation.
Replace: Select a different icon.