Tela do cliente
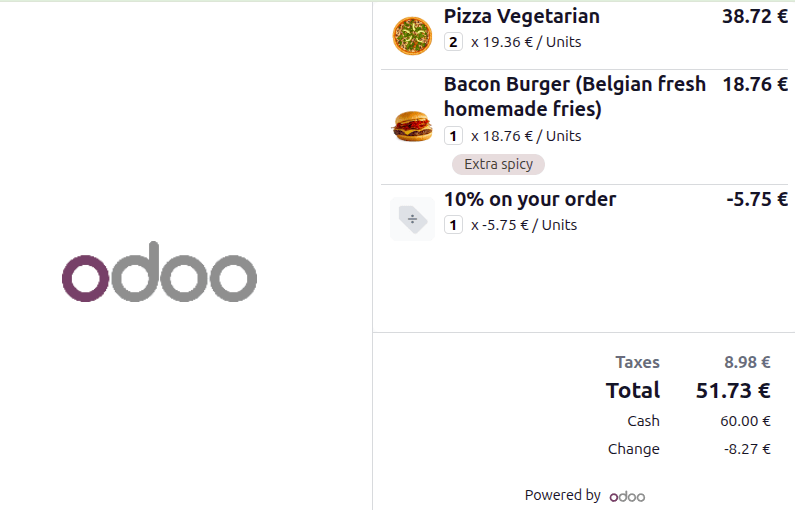
O recurso de display do cliente fornece atualizações em tempo real em uma tela secundária para clientes durante o processo de checkout. Ele mostra as seguintes informações:
Items in the cart <pos/use/sell>
Unit prices
Line (product) totals and overall total
Taxes <pos/pricing/taxes>
Discounts and promotions <pos/pricing/loyalty>
Added notes <pos/use/notes>
Selected payment method
Change due, if applicable
Por fim, o cliente paga 60.00€ em dinheiro e recebe 8.27€ de troco.
Configuração
A tela do cliente pode ser exibida em uma tela secundária conectada via USB-C ou HDMI, ou em uma tela conectada através de um IoT box <pos/hardware_network/display-configuration-iot>. Também é possível configurá-la sem fio por digitalização de código QR <pos/hardware_network/open-display>.
A imagem de fundo pode ser personalizada nas configurações do PDV <pos/use/settings>. Para isso, role para baixo até a seção Dispositivos Conectados e, em Tela do Cliente, clique em Fazer upload do arquivo. Em seguida, selecione a imagem relevante e clique em Salvar.
Usando um IoT box
Para conectar uma tela do cliente via IoT box:
either connect the screen to the IoT box during its setup;
or navigate to the POS settings <pos/use/settings>, scroll down to the Connected Devices section, make sure the IoT Box setting is enabled, and select the relevant device in the Customer Display field.
Abrindo a tela do cliente
Para abrir a tela do cliente, siga estas etapas:
Access the POS register <pos/use/open-register>.
Click the fa-bars (hamburger menu) icon in the upper-right corner.
Click the fa-desktop (Customer Display) icon.
On the Open Customer Display pop-up, choose the device to use for the customer display:
This device: Use this option if a secondary screen is connected via USB-C or HDMI, then drag the customer display window to that screen.
Display QR: Scan the QR code to open the customer display on any internet-connected device.