Entrega de refeições online
O UrbanPiper é um sistema de gerenciamento de pedidos que se integra a várias plataformas de entrega de alimentos. Ele consolida os pedidos de todas as plataformas conectadas em uma única interface, simplificando o processo de entrega.
Provedores compatíveis:
Configuração
Pré-requisitos
Para usar a integração UrbanPiper em um ambiente de produção em tempo real, certifique-se de que os seguintes requisitos sejam atendidos:
UrbanPiper subscription: A valid UrbanPiper subscription is mandatory.
Odoo requirements:
Odoo subscription: An active Odoo Enterprise subscription is required. Odoo Community does not support this integration.
Odoo version: Odoo Enterprise version 18.0 or above.
Odoo platform: All Odoo platforms are supported, including Odoo Online, Odoo.sh, and On-Premise installations.
Delivery platform reseller account: A registered reseller account is required with each delivery platform to be integrated (e.g., Uber Eats, DoorDash, Careem, Deliveroo, Zomato).
Credenciais do UrbanPiper
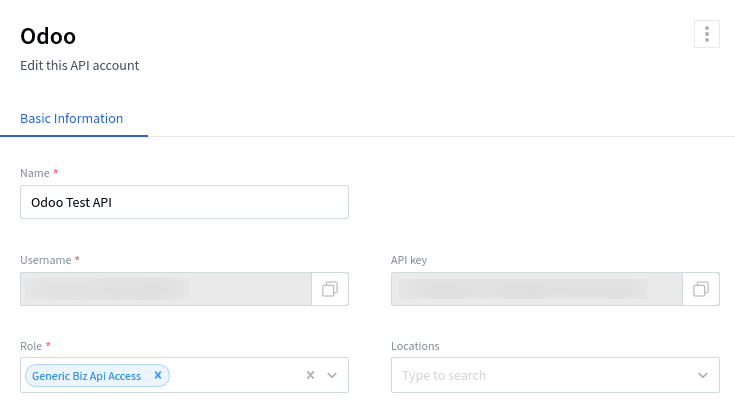
Get your Atlas credentials:
Go to the POS settings <pos/use/settings>.
Scroll down to the Food Delivery Connector section.
Click Fill this form to get Username & Api key and fill out the survey.
Go to your Atlas account and retrieve your API key and username by navigating to .
Ponto de Venda
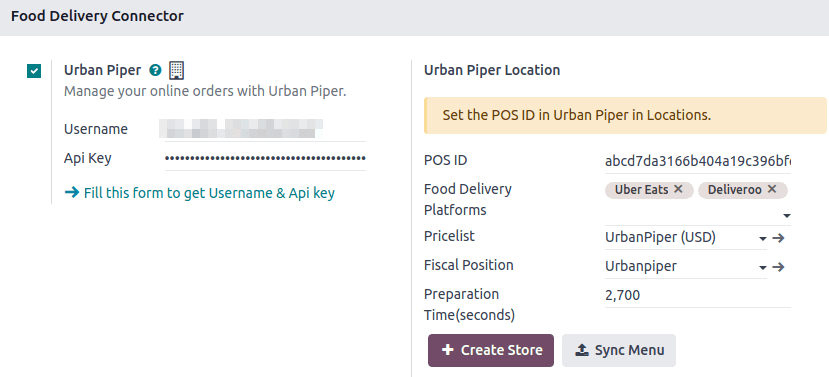
Enable the Urban Piper setting:
Go to the POS settings <pos/use/settings>.
Scroll down to the Food Delivery Connector section.
Check the Urban Piper setting.
Set up UrbanPiper:
Fill in the Username and Api Key fields with your UrbanPiper credentials <online_food_delivery/credentials>.
Select the desired delivery providers in the Food Delivery Platforms field under the Urban Piper Location section (i.e., Zomato, Uber Eats).
Save the settings.
Click the + Create Store button. Doing so creates a new location on the UrbanPiper Atlas platform.
Horários da loja
Configure os horários da loja para definir quando os serviços de entrega estão disponíveis:
Navigate to .
Add a new timing record by clicking New to add a line, or edit an existing line.
Fill in the Week Day, Starting Hour, Ending Hour, and Point of Sale associated with this timing columns.
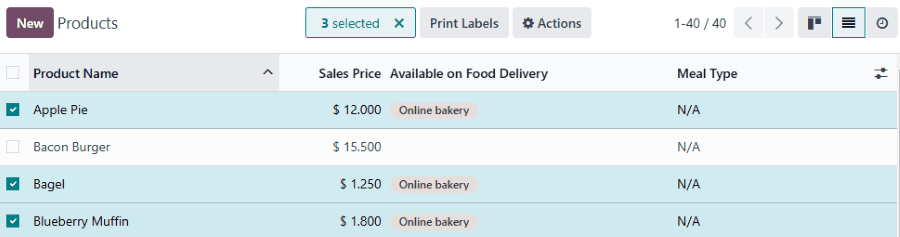
Produtos
Disponibilizar produtos individualmente,
Go to .
Select any product to open its product form.
Go to the Point of Sale tab.
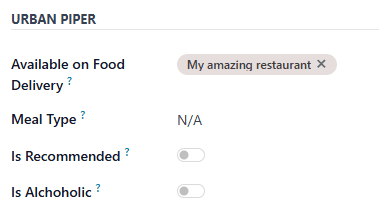
Complete the Urban Piper section:
Fill in the Available on Food Delivery with the desired POS.
Optionally, set up the Meal Type field and enable the Is Recommended and Is Alcoholic buttons.
Para disponibilizar vários produtos de entrega de refeições de uma só vez,
Go to .
Click the list icon (oi-view-list) to switch to the list view.
Select the products.
Enter the desired POS in the Available on Food Delivery column.
Sincronização
Para disponibilizar produtos em plataformas de entrega de refeições, sincronize com sua conta UrbanPiper:
Go to the POS settings <pos/use/settings>.
Scroll down the Food Delivery Connector section.
Click the Sync Menu button.
The Last Sync on timestamp below the Create Store and Sync Menu buttons updates.
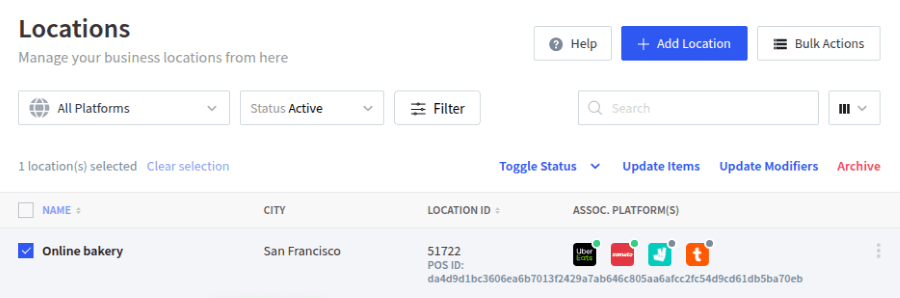
Publicar
Go to the Locations tab of your Atlas account.
Select the location to activate, then click Request to go Live.
In the popup window:
Select the platform(s) to activate and click Next.
Enter the Platform ID and Platform URL in the corresponding fields to establish the connection between the platform and UrbanPiper.
Click the Request to Go Live button.
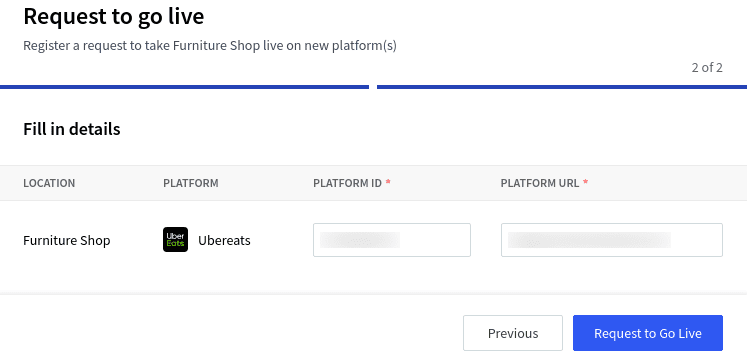
Para encontrar o ID da plataforma e URL da plataforma do local,
Click the location to open its setup form.
The location's parameters are available in the HUB tab.
Verify that your location is live:
Go to the Locations tab of your Atlas account.
Select any provider in the Assoc. platform(s) column to review the status of that platform for this location.
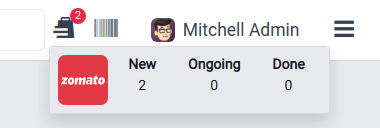
Fluxo de pedidos
Um pedido feito pela plataforma de entrega configurada aciona uma notificação. Para gerenciar esses pedidos, abra a visualização da lista de pedidos por:
Clicking Review Orders on the notification popup.
Clicking the bag-shaped icon for online orders and New.
Em seguida,
Select the desired order.
Click the Accept button.
When an order is accepted, its Order Status switches from Placed to Acknowledged and is automatically displayed on the preparation display.
Quando o pedido estiver pronto,
Open the orders' list view.
Select the order.
Click the Mark as ready button. Its Order Status switches from Acknowledged to Food Ready, and its Status switches from Ongoing to Paid.
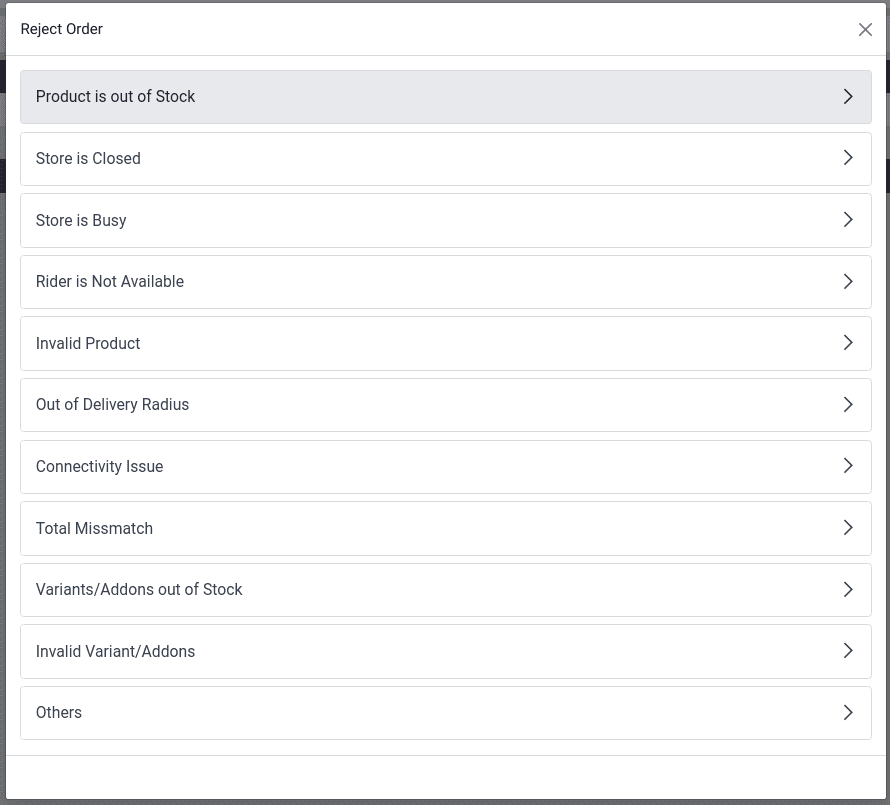
Rejeição de pedido
Às vezes, a loja ou o restaurante pode querer rejeitar um pedido. Nesse caso, abra a visualização da lista de pedidos,
Select the desired order.
Click the Reject button.
Select one of the reasons from the popup window.