Regras de aprovação
As regras de aprovação são utilizadas para automatizar os processos de aprovação de ações. Isso permite definir os critérios para quando uma aprovação é necessária antes de uma ação poder ser executada usando um botão.
Configuração
Para adicionar regras de aprovação com o Estúdio, proceda da seguinte forma:
Open Studio <studio/access> and switch to the required view.
Select the button to which the rule should be applied.
Click fa-plus Add an approval step in the fa-server Properties tab.
Specify which users are responsible for approving the action by using one of the following fields or both:
Approvers to specify one or several users;
Approver Group to specify one user group.
Uma atividade é criada para todos os usuários definidos como Aprovadores quando sua aprovação é solicitada.
(optional) Select the Users to Notify via an internal note when the action is approved or rejected.
(optional) Add a Description to be displayed on the button.
Para adicionar outra etapa de aprovação, clique em fa-plus Adicionar uma etapa de aprovação. Quando houver várias etapas, você poderá:
Enable Exclusive Approval on any step so that a user who approves a step cannot approve another step for the same record.
Change the Approval Order of the steps by selecting a number, 1 being the first step, 2 the second step, and so on. A user responsible for a higher step can approve/reject previous step(s) unless Exclusive Approval is selected.
Clique no ícone fa-trash (lixeira) ao lado do campo Aprovadores para remover uma etapa de aprovação.
Usar ===
Depois que uma regra de aprovação tiver sido definida para um botão, um ícone de avatar de usuário será exibido ao lado do rótulo do botão para cada etapa de aprovação. Clicar em um ícone revela a(s) etapa(s).
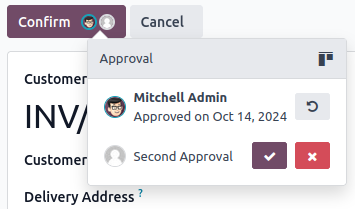
Os usuários autorizados podem:
Perform the action directly by clicking the button if it is the last/only approval step.
Approve the action and let another user perform it - or move it to the next approval step - by clicking the user avatar icon next to the button's label, then clicking the fa-check (approve).
Reject the action by clicking the user avatar icon next to the button's label and then the fa-times (reject) button.
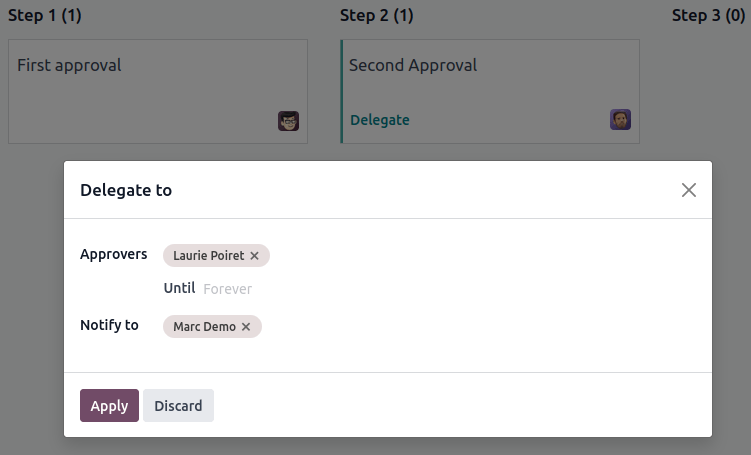
(only for users selected under the Approvers field) Delegate their approval rights to one or several users for all records by:
Clicking the oi-view-kanban (kanban view) icon and then Delegate.
Selecting one or several Approvers, Until when they will have approval rights (forever if left empty), and, optionally, the user(s) who should be notified via an internal note using the Notify to field.