Predefinições
Presets são configurações pré-configuradas usadas para aplicar rapidamente configurações predefinidas aos pedidos de PDV, como posição fiscal, lista de preços, horário de funcionamento, limite de capacidade de pedidos, etc. Eles são particularmente úteis para empresas que precisam de configurações diferentes dependendo do tipo de venda.
Configuração
Para habilitar e configurar presets para um PDV, siga estas etapas:
Go to the POS settings <pos/use/settings>.
Under Point of Sale, enable Take out / Delivery / Members.
In the Available field:
If preconfigured presets are available, select the relevant one(s) or click Search more, then New to create and configure <pos/presets/preset-form> a new preset.
If no preconfigured presets are available, click Create ..., then configure <pos/presets/preset-form> the preset.
Define a default preset in the Default field.
Click Save.
If necessary, click oi-arrow-right Configure Presets, then select the desired preset and edit it, or click New to create a new one.
No formulário Presets relevante, aplique ou edite as seguintes opções:
Enter a preset Label.
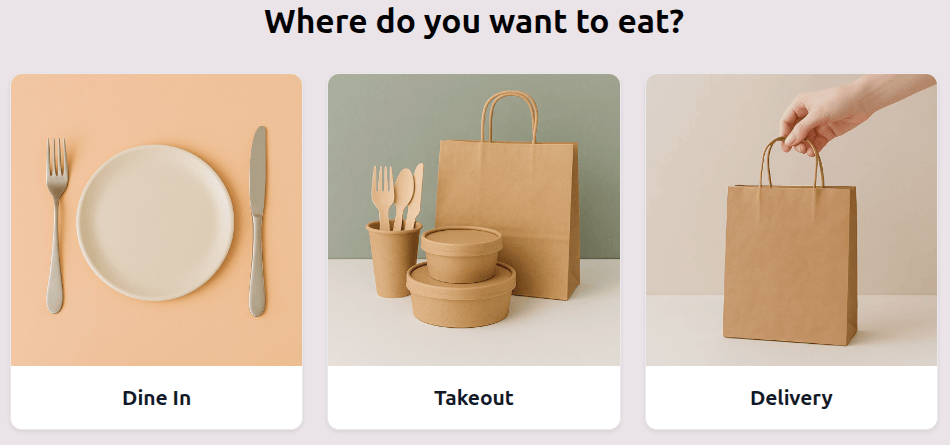
If needed, add an image by clicking the fa-pencil (Edit) button when hovering over the camera image. This image is displayed in kiosk mode <extra/presets/apply-presets>.
Pricelist: Select or configure a pricelist.
Fiscal Position: Select or configure a fiscal position. Fiscal positions are especially important in environments where customers must pay different tax rates depending on the type of order.
Manage orders by time: Enable this option to define time slots for scheduling orders. Then,
choose a working time in the Schedule based on field;
define the Preparation capacity to indicate how many orders can be handled in a given time frame;
configure the working hours in the Schedule tab.
Identification: Specify whether order identification details (such as a Name or an Address) are required.
Return mode: Select this mode only to process returns. All items added to the cart are entered as negative quantities.
Color: Define the preset button's color in the register <pos/restaurant/orders>.
In the Self Ordering tab, enable Available in self to display presets in the self-order interface. Then, select a service zone in the Service at field and select or configure an email template in the Email Confirmation field.
In the Options tab, enable Guest to require users to enter the number of guests when taking an order <pos/restaurant/orders>.
Aplicar predefinições a pedidos de PDV
As predefinições estão disponíveis tanto no registro de PDV <pos/restaurant/orders> quanto no quiosque (desde que o recurso Disponível em autosserviço esteja ativado <pos/presets/preset-form>). O fluxo de trabalho varia de acordo com a configuração da predefinição <pos/presets/preset-form>.
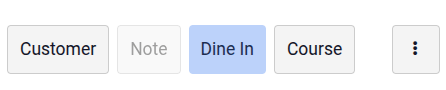
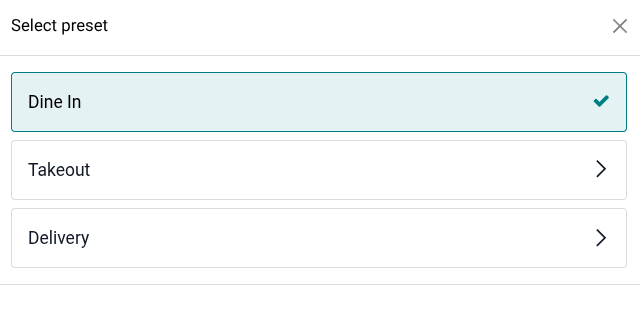
As predefinições são exibidas no registro de PDV <pos/restaurant/orders> com a predefinição padrão selecionada. Para alterar a predefinição, clique no botão de predefinição padrão e selecione uma alternativa disponível. A predefinição padrão é restaurada automaticamente para o próximo pedido.
Os recursos configurados para predefinições <pos/presets/configuration> acionam ações específicas no registro de PDV:
If Identification is required for the selected preset, you must enter specific information (depending on the selected option) before proceeding to checkout:
Name: Select an order name or enter a new one (only for restaurant points of sale). To modify it, click the fa-ellipsis-v (Actions) menu and select fa-pencil-square-o Edit Order Name.
Address: Choose an existing customer or Create a new one, and make sure they have an address assigned. The customer's name is displayed in the pad <pos/use/customers>. Click it to select a different customer or edit <pos/use/customers> the customer's details <contacts/contact-form> if needed.
Use a barra de fa-search pesquisa para encontrar um cliente.
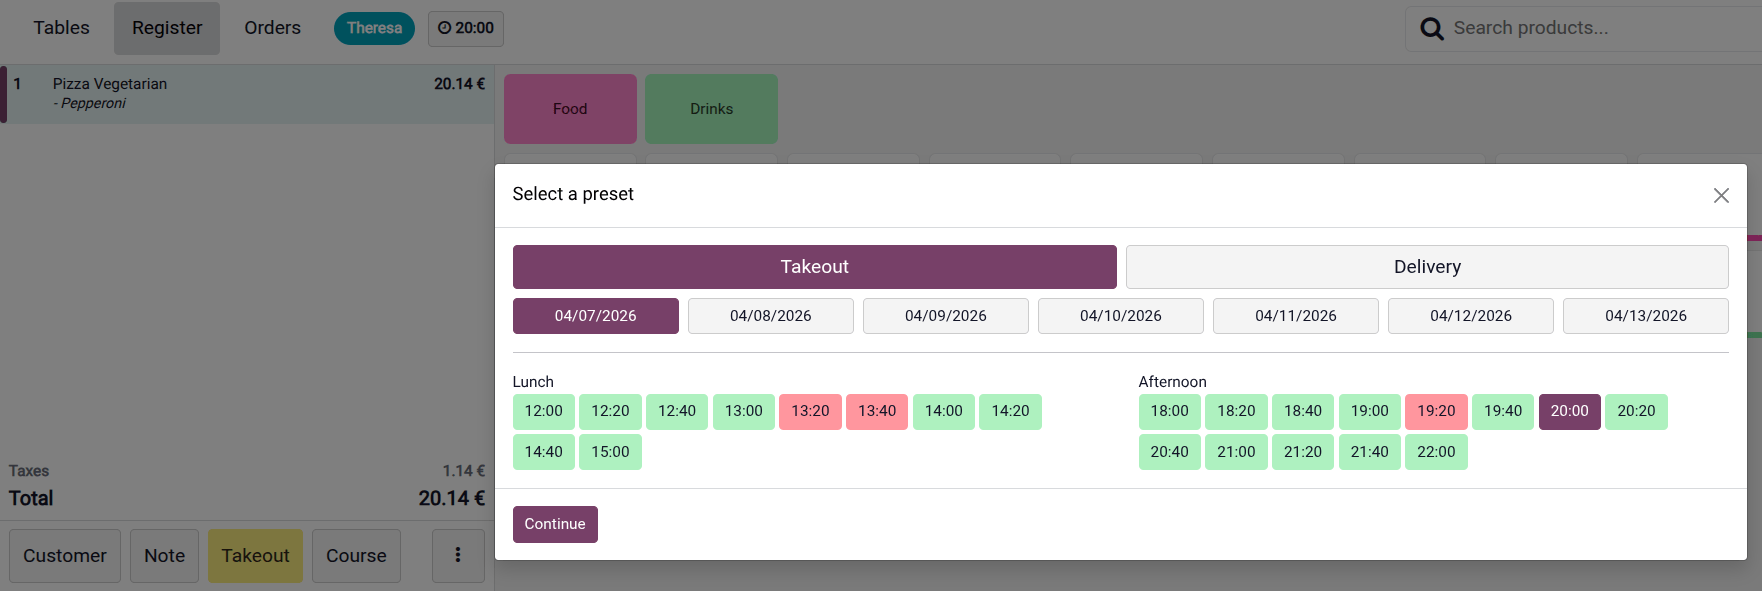
If the Manage orders by time option is enabled for the selected preset, select a date and time (displayed in green). The selected time is displayed in the header of the POS interface. Click it to modify the time.
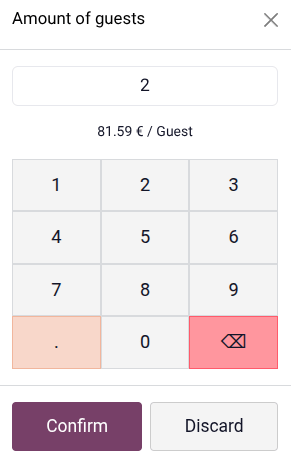
If the Guest feature is enabled for the selected preset, a pop-up appears prompting you to enter the number of guests, and the amount per guest is displayed (the total amount divided by the number of guests).
 Quiosque
As predefinições podem ser usadas no quiosque do modo de autosserviço <extra/self_order/usage-guidelines>. Assim que o cliente clica no botão Pedir Agora, todas as opções de predefinição disponíveis, juntamente com suas respectivas imagens, são exibidas.
Os recursos configurados para predefinições <pos/presets/configuration> acionam ações específicas no quiosque:
Customers may need to enter specific information in the We need more info pop-up:
If Identification is required:
Name: Customers must enter their Name. The Phone field is optional.
Address: Customers must enter their Name, Phone number, and address details.
If the Manage orders by time option is enabled: Customers must select a time on a specific date from the dropdown menu.
If the Email confirmation field is set: Customers must enter their Email to proceed.
If Table is selected in the Service at field for Self ordering mode, customers must enter their tracker number at the end of the ordering process.